

None of the methods below give you the fine, silky microfoam a steam wand or an automatic frother produces, but the jam-jar shake-and-microwave method comes closest for a home flat white or latte. Shake around 100mL of cold milk until it roughly doubles in volume, then microwave it uncovered for 30 to 40 seconds so the foam holds together long enough to pour.
You can froth milk without a frother using a jam jar, a coffee plunger, a whisk or a blender, and all four will get milk foamy enough for a flat white or latte at home. None of them match a proper steam wand, but each does a genuinely usable job once you know the real fill ratios and timing rather than just shaking a jug and hoping.
This is especially handy if you own a pod machine: most pod coffee machines skip the steam wand and the jug frother altogether, so frothing is on you from the first cup. This guide runs through all four methods properly, with the actual volumes and times, plus an honest read on how close homemade foam gets to café quality. Still getting to grips with the machine itself? Our guide to using a coffee machine covers the basics first.
What You’ll Need (No Frother Required)
You won’t need every item below, just whichever one you’ve already got on the bench.
- A clean glass jar with a tight-fitting lid, around 300 to 400mL, for the shake method
- A stovetop coffee plunger, for the pump method
- A balloon whisk and a small saucepan, for whisking by hand
- A stick blender or a stand blender, for the blitzed method
- Cold, fresh milk. Full-cream holds foam together better than skim when you’re aerating it by hand
- A microwave or stovetop, to heat and stabilise the foam
How the Four Methods Compare
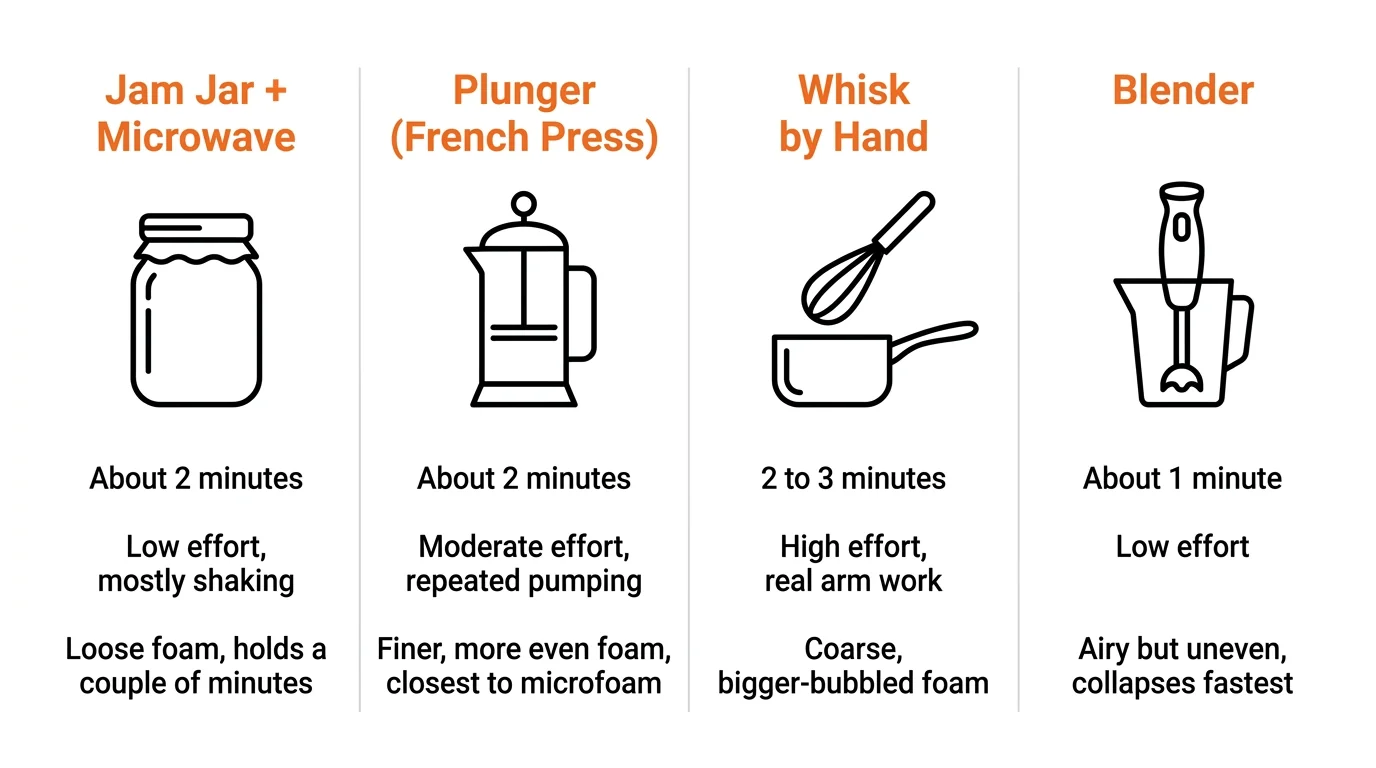
| Method | Time Needed | Effort | Foam You’ll Get |
|---|---|---|---|
| Jam jar and microwave | About 2 minutes | Low, mostly shaking | Loose foam, holds for a couple of minutes |
| Plunger (French press) | About 2 minutes | Moderate, repeated pumping | Finer and more even, the closest to microfoam here |
| Whisk by hand | 2 to 3 minutes | High, real arm work | Coarse, bigger-bubbled foam |
| Blender or stick blender | About 1 minute | Low | Airy but uneven, bubbles collapse fastest |
1. The Jam-Jar Shake-and-Microwave Method
This is the method most people already own the gear for, and it’s the one worth trying first. It works in two stages: shaking traps the air, and a short blast in the microwave stops that air escaping again the moment you pour.
- Pour 100 to 120mL of cold milk into a 300 to 400mL jar, filling it no more than a third full so the milk has room to expand.
- Screw the lid on tightly and shake hard, up and down rather than side to side, for 30 to 45 seconds until the milk has roughly doubled in volume and looks like thick shaving foam.
- Take the lid off. Never microwave a sealed jar; the trapped heat and air have nowhere to go.
- Microwave the jar uncovered for 30 to 40 seconds, checking at the halfway mark, until the milk is hot to touch (around 60 to 65°C) but not boiling. This is the step that stops the foam collapsing straight back into liquid.
- Tap the jar on the bench a couple of times to knock out any oversized bubbles, then pour. Hold the foam back with a spoon first if you want it layered on top rather than mixed through.
Skipping the microwave step is the single biggest reason this method disappoints people. Shaken milk on its own looks great for about 30 seconds, then flattens out again once it’s back to room temperature.
2. Using a Plunger (French Press) to Froth Milk
A coffee plunger, French press if that’s the term you grew up with, works as a frother because the mesh does the same job as a whisk, just with more consistent pressure behind it.
- Heat 150 to 200mL of milk on the stovetop or in the microwave until it’s hot but not simmering, roughly 60 to 65°C.
- Pour the hot milk into the empty plunger beaker, filling it to around a third, and fit the lid with the plunger raised right to the top.
- For a thick, cappuccino-style foam, pump the plunger firmly from the very top of its travel to the very bottom, about 20 to 30 strokes over roughly 20 seconds.
- For something closer to microfoam, keep the mesh just under the surface and use short, quick strokes without breaking through the top of the milk. This traps smaller bubbles instead of big ones.
- Let it sit for 20 to 30 seconds so the largest bubbles rise and settle, then pour slowly.
If the plunger’s also your daily coffee pot, give it a proper rinse before it goes back to brewing. Milk residue left in the mesh turns rancid fast and taints the next pot.
3. Whisking Milk by Hand
This is the least efficient method here, but it needs nothing but a saucepan and a whisk you already own.
- Heat milk in a small saucepan over medium heat until small bubbles form at the edge, not a rolling boil, around 65°C.
- Whisk vigorously in a circular motion, working the whisk up toward the surface rather than just stirring flat, for 60 to 90 seconds.
- Expect real effort here. A hand whisk pulls in less air than a jar or a plunger, so the foam comes out looser and more uneven.
4. Blender or Stick Blender, Briefly
A stick blender does much the same job as the jar and plunger, just faster and with a motor doing the work. Pour 150 to 200mL of warm milk into a tall, narrow container, filled no more than halfway, and blend on low for 20 to 30 seconds, tilting the blender slightly so it pulls air in from the surface. A stand blender works too: pour in warmed milk and run it on high for 15 to 20 seconds. Both tend to throw up bigger, more uneven bubbles than a jar or plunger, and a wide blender jug won’t aerate milk anywhere near as evenly as a narrow one will.
What “Good Enough” Actually Looks Like
None of these four methods will give you the fine, silky microfoam a steam wand or an automatic frother produces, and it’s worth being upfront about that before you try one expecting café results. A steam wand injects a steady stream of very fine air bubbles while holding the milk at a near-constant temperature, something a jar, a plunger or your own arm can’t really replicate.
What you can realistically get at home is a thin, loose layer of foam that folds through a flat white reasonably well, or a looser cap on a latte. It won’t hold latte art, and it won’t survive sitting around for more than a minute before it separates. That’s a fair trade for zero extra gear, but if you want consistent, café-style foam every morning, it’s worth reading our guide to using a milk frother, which covers the handheld wand, the automatic jug and the steam-wand method properly.
Common Mistakes That Ruin Homemade Froth
- Boiling the milk. Past about 70°C, milk starts to scald, which flattens the taste and breaks down the proteins that hold foam together.
- Overfilling the jar or plunger. Milk roughly doubles once it’s aerated, so filling past a third leaves nowhere for it to expand.
- Microwaving a sealed jar. Always take the lid off first, every time.
- Skipping the reheat step after shaking. Foam made from cold milk alone collapses within a minute unless it’s warmed to stabilise it.
- Starting with milk that isn’t fridge-cold. Cold milk traps air better than milk at room temperature, whichever method you’re using.
When It’s Worth Buying an Actual Frother
If this is a once-a-week fix, any of the four methods above is fine. But if you’re doing it every morning, the effort adds up: a jar needs real shaking, a plunger needs a proper wash before it goes back to brewing coffee, and a whisk is genuinely hard work over a full week of flat whites. It’s worth calling it when the routine becomes the part of your morning you actually dread, or when you’re regularly frothing for more than one person without a spare five minutes per cup.
Frequently Asked Questions
Can you froth milk without a frother?
Yes. A jam jar, a coffee plunger, a whisk or a blender can all aerate milk enough for a home flat white or latte, though none of them match the fine microfoam a steam wand produces.
What is the best way to froth milk without a frother?
The jam-jar shake-and-microwave method works best for most kitchens: shake cold milk until it doubles in volume, then microwave it uncovered for 30 to 40 seconds so the foam holds together.
Can I froth milk in a French press?
Yes. Heat the milk first, pour it into the empty plunger no more than a third full, then pump repeatedly, short strokes near the surface for finer foam or full strokes for a thicker cap.
Why does my homemade milk foam collapse so fast?
Usually because it was never reheated after shaking or whisking. Foam made from cold milk alone falls apart within a minute or two unless it’s warmed to around 60 to 65°C to help it hold.
Is shaking milk in a jar actually enough to froth it?
Yes, shaking traps air the same way any manual method does, though it produces looser, bigger-bubbled foam than a steam wand and still needs the microwave step to stop it collapsing.
