
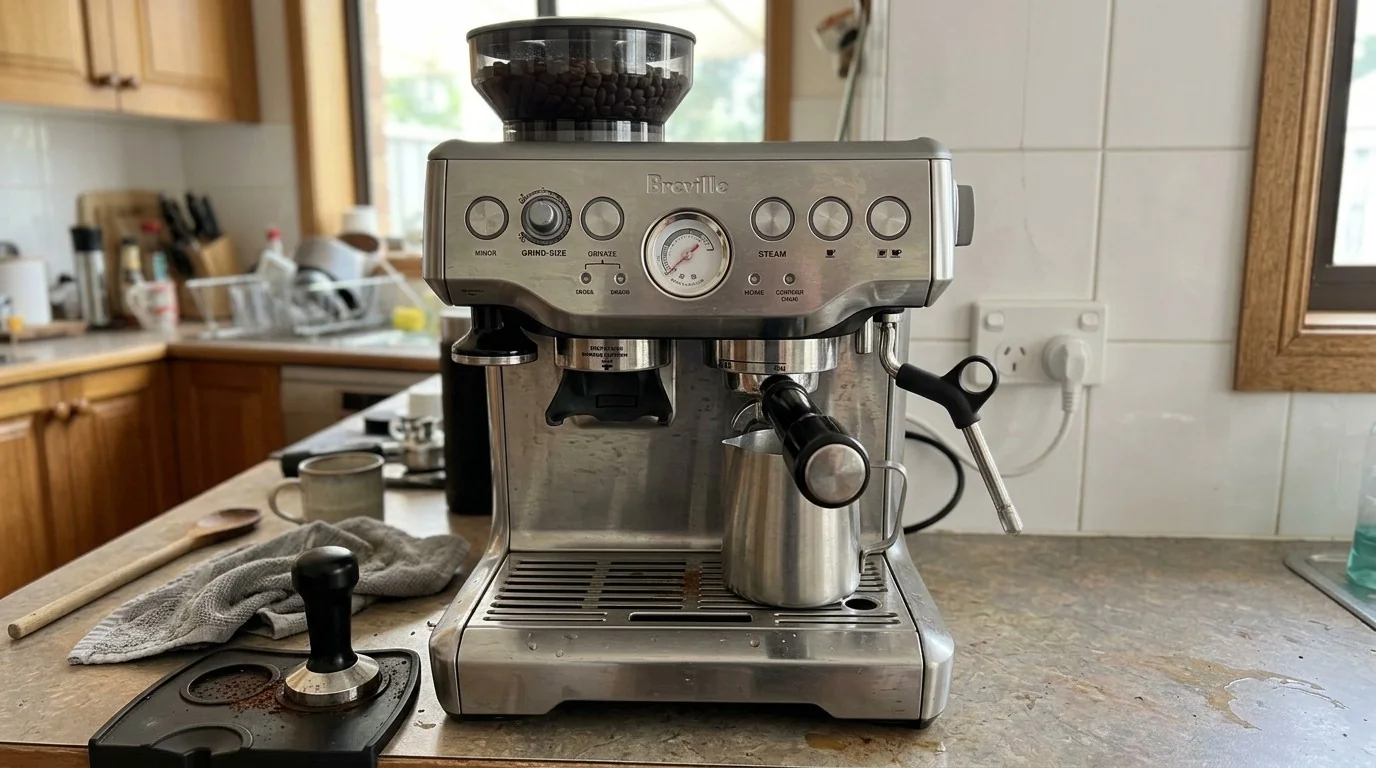
To use a Breville coffee machine like the Barista Express, grind fresh beans straight into the portafilter, level and tamp the dose evenly, lock it into the group head, then pull a 1 Cup shot (about 30 mL) or a 2 Cup shot (about 60 mL) before texturing milk separately with the swivel steam wand. Other Breville models such as the Barista Touch or Oracle automate several of these steps, so treat the sequence below as verified for the Barista Express specifically, not the whole range.
Working out how to use a Breville coffee machine for the first time can feel like a lot of dials and buttons for one cup of coffee, but the actual sequence is short. Grind into the portafilter, dose it, tamp it, lock it into the group head, then pull the shot, and texture your milk separately once the coffee’s already extracting flavour. This guide walks through how to use a Breville coffee machine on the Barista Express (BES875), the model Breville’s own instruction book documents step by step.
A quick note before the steps: Breville sells a wide range of home machines, and the button layout below is verified against the Barista Express (BES875) instruction book specifically. A Barista Pro or Barista Touch handles some of this automatically through a screen, the Oracle grinds, doses and tamps on its own, and even the entry-level Bambino skips the built-in grinder entirely. If a dial, light or button on your machine doesn’t match what’s described here, check the manual that actually came with your model rather than assuming every Breville behaves the same way.
Barista Express Quick Reference
| Feature | Barista Express (BES875) spec |
|---|---|
| Bean hopper capacity | 250 g |
| Grind size settings | 16, finer at the low numbers, coarser at the high numbers |
| Recommended starting grind | No. 5, adjusted from there |
| Portafilter size | 54 mm stainless steel |
| Single wall basket dose | Approximately 8 to 11 g |
| Double wall or double basket dose | Approximately 16 to 19 g |
| Tamping pressure | Roughly 10 to 15 kg, consistent every time matters more than the exact figure |
| 1 Cup preset volume | Approximately 30 mL |
| 2 Cup preset volume | Approximately 60 mL |
| Water tank capacity | 2 litres, removable and filled from the top |
What You’ll Need
- Your Breville coffee machine, filled with fresh cold tap water
- Freshly roasted whole coffee beans for the hopper
- A jug of cold milk if you’re making a flat white, latte or piccolo
- A few minutes, more on the very first use while the machine heats and you dial in the grind
1. Fill the Tank and Let the Machine Warm Up
Slide the 2 litre water tank out, fill it with fresh cold tap water to the marked maximum line, and lock it back into place at the rear of the machine. Press Power. The button surround flashes while the machine heats, then every button on the panel lights up steadily once it’s reached temperature. On a brand new machine, run a water-only flush first: press 2 Cup to run hot water through the group head for about 30 seconds, then turn the steam dial on for around 10 seconds, and repeat until the tank runs dry. It’s a one-off step, not something you’ll do before every coffee.
2. Choose Your Filter Basket
The Barista Express ships with both single wall and dual wall filter baskets, and which one you reach for changes how forgiving the machine is. A single wall basket suits freshly ground beans and lets grind, dose and tamp genuinely shape the espresso, for better or worse. A dual wall basket regulates pressure internally, so it’s the more consistent option for pre-ground coffee or while you’re still learning to dial the grinder in. Either way, use the 1 Cup basket for a single serve and the 2 Cup basket for two cups, or one stronger mug.
3. Grind Into the Portafilter
- Fill the hopper with fresh beans, up to its 250 g capacity.
- Fit the filter basket into the portafilter, then twist the dosing funnel on top of it.
- Press the FILTER SIZE button to select single or double, matching whichever basket you loaded.
- Slot the portafilter into the grinding cradle and push it gently to start automatic dosing, or hold the manual dosing switch down for direct control over how long the grinder runs.
- Set the GRIND SIZE dial as your starting point. Breville recommends No. 5 on the 16-setting dial, finer numbers running powdery and coarser numbers running gritty either side of it.
Grind size does more work than any other variable here. Too fine and the espresso comes out slow, dark and bitter, over extracted in Breville’s own terms. Too coarse and it rushes through pale and thin, under extracted with barely any crema on top.
4. Level the Dose and Tamp It Evenly
- Set the GRIND AMOUNT dial to its 3 o’clock starting position and adjust from there, aiming for the tamper’s cap sitting level with the filter basket’s rim once you’ve tamped.
- Remove the portafilter from the cradle and tap it a few times on the bench edge to settle and level the grounds before tamping.
- Tamp down firmly and evenly, around 10 to 15 kg of pressure, though a consistent tamp matters more than hitting an exact number every time.
- Trim any excess with the Razor tool if the dose sits high, rotating it across the rim of the basket to level the puck before extraction.
Those hopper, portafilter and tamping figures come straight from Breville’s own Barista Express instruction book, so they’re worth treating as the reference rather than a guess, especially while you’re still working out your own routine.
5. Lock In the Portafilter and Pull the Shot
- Wipe the group head seal and lock the portafilter straight in, never with the dosing funnel still attached.
- Press 1 Cup for a short single shot (around 30 mL, closer to a short black in strength) or 2 Cup for a double (around 60 mL). Both presets stop the machine automatically once they’ve reached that volume.
- Watch the pressure gauge as it runs. A needle sitting in the middle band means you’re in the ideal zone. Low in the gauge points to an under extracted, watery shot; high in the gauge points to an over extracted, bitter one.
- Adjust grind size or dose next time, not this time, if the gauge or the taste tells you something’s off. Changing variables mid-shot won’t fix the one already in the cup.
Prefer to control the pour yourself? Press and hold 1 Cup or 2 Cup instead of tapping it, and release once you’ve got the volume you want. That’s manual mode, and it overrides the preset entirely.
6. Steam and Texture the Milk
Skip this step for a short black or long black. For a flat white, latte or piccolo, the 360° swivel steam wand does the texturing, separately from the coffee side of the machine.
- Turn the steam dial to the steam position with the wand tip over the drip tray first, not the milk. The steam light flashes while it heats.
- Once the light stops flashing, return the dial to standby briefly before inserting the wand into the jug. That pause, roughly 8 seconds, stops milk splashing back out when steam first hits it.
- Insert the wand and turn the dial back to steam to start texturing, keeping the tip just under the surface to draw in air before it sinks in to heat the milk through.
- Return the dial to standby once you’ve got the texture and temperature you want, then wipe and purge the wand straight away, before the milk left inside it dries on.
Going straight from steaming back into another shot? The Barista Express runs an auto-purge in the background, releasing a little water internally so the group head isn’t too hot and doesn’t scorch the next dose. You don’t need to do anything extra for that part.

When to Adjust Your Grind
You won’t set the grind once and forget it. A new bag of beans, a different roast level, or even a swing in humidity can shift how fast a shot runs. If your espresso is pulling faster than about 25 to 30 seconds for a double, or the pressure gauge is sitting low, go one or two numbers finer on the GRIND SIZE dial. Running long and slow, or the gauge sitting high, means going coarser instead. Change one variable at a time, grind or dose, so you can actually tell what fixed it.
Keeping It Running Between Coffees
Using a Breville well and maintaining it are two different jobs. The integrated grinder needs an occasional brush-out, covered in our guide to cleaning a coffee grinder, since stale grounds dull flavour long before anything actually breaks. Day-to-day upkeep of the portafilter, baskets and steam wand is its own routine, covered in full in how to clean a Breville coffee machine. Mineral scale from your tap water builds up over months rather than days, which is why we’ve also got a dedicated walkthrough on descaling a Breville coffee machine once the CLEAN/DESCALE light turns solid.
Common Mistakes
- Locking the portafilter in with the dosing funnel still attached, rather than removing it first.
- Tamping unevenly, harder on one side than the other, which pushes water through the softer side and leaves the shot tasting thin.
- Inserting the steam wand straight into the milk without pausing the dial first, so it splashes on contact.
- Judging grind size off one bad shot instead of checking the pressure gauge and adjusting one setting at a time.
- Assuming a Barista Pro, Touch or Oracle uses the identical button sequence, when several of those steps are automated differently on those models.
When It’s a Fault, Not Just Technique
A shot that runs wildly fast or slow no matter how far you adjust the grind, a portafilter that won’t seat properly, or a steam wand that’s stopped producing any pressure at all point to something mechanical rather than technique. If the basics, clean baskets, fresh water, a sensible grind, still won’t produce a normal shot, it’s worth a proper descale first. Beyond that, a call to Breville’s service line beats continuing to guess.
Still deciding whether a manual machine like this one actually suits how you drink coffee day to day, versus something more automated? That belongs in our full [INTERNAL LINK OPPORTUNITY: How to Choose the Best Coffee Machine (Buying Guide)] rather than a using guide focused on one model.
