
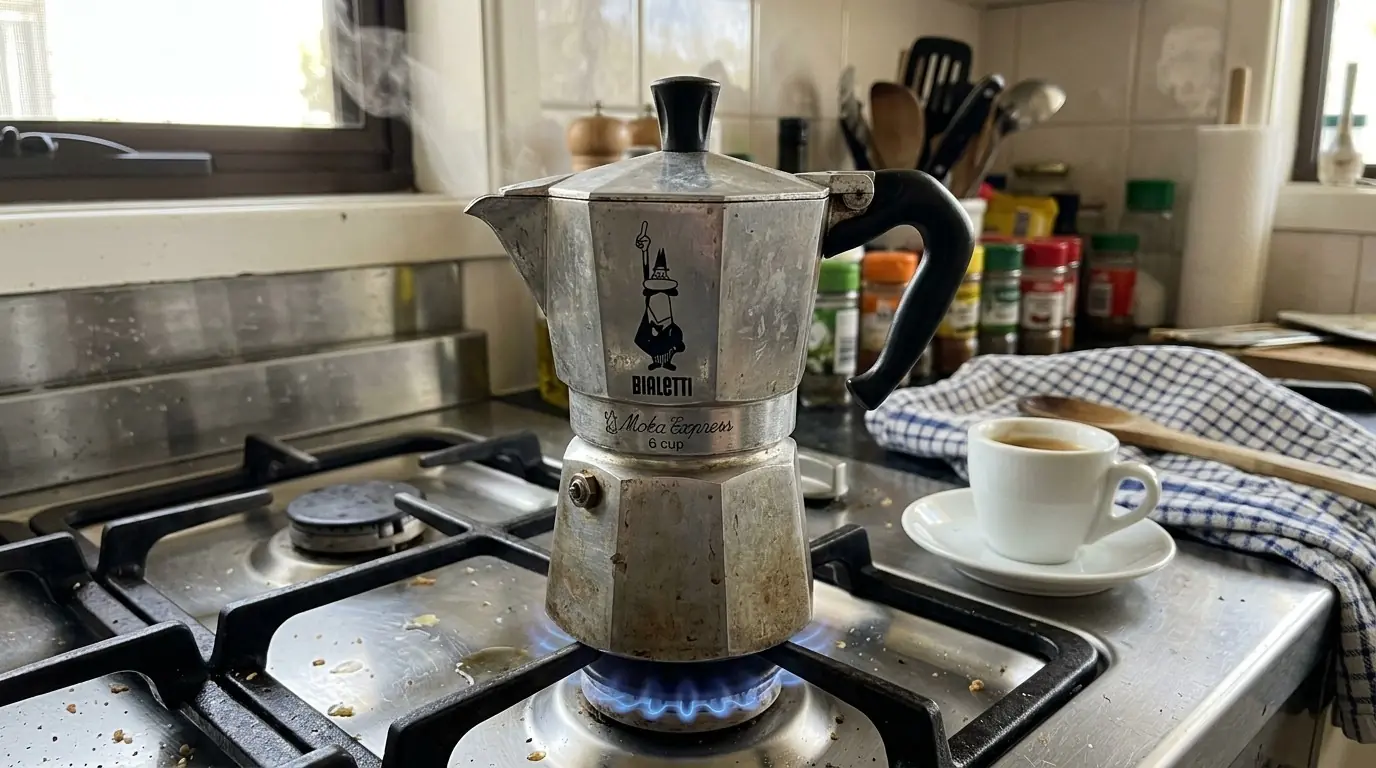
Key takeaway: Fill a moka pot’s base with water to just below the safety valve, load the funnel with a fine-medium grind without tamping it, then brew on low to medium heat. The moment the sound changes from a steady hiss to a wet gurgle, take it off the heat: that gurgle means the water’s spent, and every extra second scorches whatever coffee is left.
To use a moka pot, fill the bottom chamber with water up to the safety valve, spoon a fine-medium grind into the metal filter basket without pressing it down, screw the top and bottom together, and put it on a burner sized to the base with the heat on low to medium. Coffee should start bubbling into the top chamber within a couple of minutes. Once the sound shifts from a steady hiss to a wet, spluttering gurgle, pull it off the heat straight away, since that gurgle means the water’s run dry and any longer just burns what’s left.
Get the water line, the grind and the heat right, and a moka pot is one of the simplest ways to make a strong, stovetop coffee without a power point anywhere in sight. Get any of the three wrong and you’ll usually know fast: water hissing out through the seams, a burnt smell, or a cup that’s mostly bitterness.
Moka Pot Brewing at a Glance
| Step | What to Do |
|---|---|
| Water level | Fill the base to just below the safety valve, never above it |
| Grind size | Fine-medium: coarser than espresso, finer than filter or plunger coffee |
| Coffee dose | Fill the funnel loosely and level it off; don’t tamp |
| Heat | Low to medium on the stovetop, never high |
| Brew time | Roughly 4 to 5 minutes once it’s on the heat |
| Listen for | A steady hiss shifting into a wet, spluttering gurgle |
| Cleaning | Rinse in warm water only for aluminium; no soap, no dishwasher |
What You’ll Need
- A moka pot sized to how many cups you want; the classic Bialetti Moka Express runs from 1 cup up to 18 cups
- Fresh coffee, ground fine-medium just before brewing if you can manage it
- Cold tap water
- A stovetop burner sized to the base of the pot, or a compatible induction plate if your model’s made for one
- A tea towel or oven mitt, since the handle and upper chamber both get properly hot
How a Moka Pot Works: The Three Chambers
A moka pot is a stovetop coffee maker that brews with steam pressure instead of a pump or gravity, and almost every design follows the same three-chamber layout, from the classic aluminium Bialetti Moka Express, the reference design most other moka pots still copy, through to newer stainless steel versions. Knowing what each chamber does makes the actual brewing steps make a lot more sense.
- Base (lower chamber): holds the water and includes the safety valve, a small spring-loaded outlet built to release pressure if it ever climbs past a safe level.
- Filter basket (funnel): the metal basket that sits inside the base and holds the ground coffee. Water is forced up through this basket as steam pressure builds underneath it.
- Upper chamber (collector): where the brewed coffee collects before you pour it, connected to the base by a central spout tube that runs down through the coffee grounds.
- Two smaller parts do a lot of the work too: a rubber gasket that seals the join between the two halves, and a perforated metal filter plate that sits on top of the grounds and catches fine particles before they reach your cup.
Put the moka pot on heat and the sealed base traps the steam building as the water warms. That steam has nowhere to go except up through the coffee in the funnel, pushing the water ahead of it and up the spout tube into the top chamber. It’s a much gentler pressure than a pump espresso machine produces, typically only 1 to 2 bar against an espresso machine’s 9 bar, which is part of why moka pot coffee is strong but not a true espresso, no matter how often it gets called “stovetop espresso.”

How to Use a Moka Pot: Step by Step
- Fill the base with cold water up to just below the safety valve, never above it. Overfilling waters the coffee down and can stop the valve doing its job properly, according to Bialetti’s own Moka Express instructions.
- Insert the filter basket into the base and fill it loosely with a fine-medium grind, levelling the top with a finger rather than pressing it down. A moka pot’s funnel isn’t a portafilter, and tamping it can force pressure past where it’s meant to escape.
- Wipe any stray grounds from the rim, then screw the upper chamber onto the base until it’s firmly closed, without using the handle as a lever.
- Place it on a burner roughly the same size as the base, on low to medium heat. A flame that laps up the sides heats the handle and the seal as much as it heats the water.
- Listen rather than watch. A quiet hiss as the water heats gives way to a bubbling as coffee starts moving into the top chamber.
- Take it off the heat the instant the sound turns to a louder, wetter gurgle. That gurgle means the water’s spent, and it’s now pushing steam through what’s left of the grounds, which is exactly what scorches the last of the coffee.
- Give the pot a gentle swirl before you pour. The strongest coffee tends to settle at the bottom of the top chamber.
Freshly ground coffee matters more here than on most machines, since a moka pot’s grind window is narrower than a drip machine’s. A grinder caked in stale, oily residue mutes the cup before the pot even gets a chance, so it’s worth keeping your grinder clean between batches too.
How Often to Clean and Descale a Moka Pot
A moka pot needs attention on two different schedules: a quick rinse after every single use, and an occasional descale to clear the mineral scale that Australian tap water leaves behind over weeks and months.
Rinse the base, funnel and upper chamber in warm water straight after use, and let them air dry fully before putting the pot back together. Bialetti’s own cleaning guidance for the classic aluminium Moka Express is blunt about detergent: skip it entirely, since soap can taint the aluminium and carry through into the next brew, and skip the dishwasher too. If you’ve bought a stainless steel moka pot rather than the classic aluminium design, check that model’s own instructions before assuming the same rule applies. Some stainless designs tolerate a mild detergent and even a dishwasher cycle, but the aluminium original doesn’t.
Mineral scale builds up inside the base and around the valve much the same way it does inside an electric machine’s boiler, just without a power cord to blame it on. The same manufacturer guidance above recommends brewing a batch with no coffee at all, using a couple of teaspoons of citric acid or white vinegar dissolved in the water instead. Roughly every 1 to 2 months suits harder Australian tap water; stretch that out if yours is naturally soft or filtered. Chasing the same mineral scale out of an electric machine elsewhere in the kitchen runs on the identical citric-acid logic, just pushed through as a powered cycle instead of a hand-brewed soak, which is exactly what our generic descaling guide covers.
Common Mistakes
- Filling the base past the safety valve, which can stop the valve doing its job properly and waters the coffee down besides.
- Tamping the grounds like you would in an espresso portafilter, the single most common way to force too much pressure through a pot that isn’t built for it.
- Cranking the heat up to speed things along, which scorches the coffee right as it finishes and can warp a thin aluminium base over time.
- Washing an aluminium pot with dish soap or running it through the dishwasher, which taints the metal and every coffee that follows.
- Leaving a hardened, cracked or flattened rubber gasket in place because the pot still technically works, right up until the day it stops sealing properly.
When to Replace Parts, Not the Whole Pot
A moka pot is mostly parts, not electronics, so most problems have a cheap fix rather than a bin-it verdict.
- Rubber gasket: replace it once it’s hardened, cracked or visibly flattened, usually somewhere between 1 and 2 years of regular use. Steam escaping from the seam between the two halves, rather than from the safety valve, is the tell.
- Filter plate: the small perforated disc that sits on top of the grounds. Replace it if it’s permanently clogged with dried coffee oils that a rinse won’t shift.
- Handle: a cracked, melted or loose handle is a burns risk, not a cosmetic one. Stop using the pot until it’s fixed or replaced.
- Base or valve: a dented base that won’t sit flat on the burner, or a safety valve that’s stuck, corroded or won’t move, means it’s time to retire the whole pot rather than keep brewing with it. It’s a small pressure vessel, and that’s not the part of the kitchen worth cutting corners on.
Still deciding whether a moka pot is even the right way to make coffee at home, against a pod machine or a bean-to-cup one? That’s a bigger decision than this guide, and belongs in our full How to Choose the Best Coffee Machine (Buying Guide)] rather than a walkthrough focused on one brewing method.
Comparing brewing styles rather than machines? Our upcoming How to Use a French Press / Coffee Plunger and pour-over guides will cover the other common manual methods, for the times a stovetop pot isn’t quite the fit, and a future Best Moka Pot roundup will cover which models are actually worth buying.
